This guide offers a comprehensive walkthrough on establishing a seamless integration between Verbolia and your GA4. By following these steps, you’ll gain a deeper insight into your visitors’ behavior and the efficacy of your landing pages.
Short summary #
- Add GA4 script to Verbolia pages → done by Verbolia
- Create technical cookie when visitor lands on Verbolia page → done by Verbolia
- Adapt purchase event → to be done by Customer
a. Read ‘v_landing’ cookie value
b. Add parameter ‘v_landing’ to purchase event - Create custom definition in GA4 → to be done by Customer or Verbolia (admin)
- Login to the correct GA4 property in the Verbolia App → to be done by Customer
- Create reporting in GA4 → to be done by Customer or Verbolia (admin)
1. GA4 script on Verbolia pages #
Adding the GA4 Analytics tag to the Verbolia pages, can be done by:
- Adding the GTM-tag to the pages, if it’s fired via the GTM-container.
- Adding the G-tag in the Settings screen in the Verbolia App.
- Adding another tag manager script directly in the html via the Verbolia Theme Editor
<!-- Google tag (gtag.js) -->
<script async src="https://www.googletagmanager.com/gtag/js?id=G-XXXXXXXX"></script>
<script>
window.dataLayer = window.dataLayer || [];
function gtag(){dataLayer.push(arguments);}
gtag('js', new Date());
gtag('config', 'G-XXXXXXXX');
</script>
2. Technical cookie creation #
First we need to make sure that a cookie is created when we detect a landing on a Verbolia page. If the referrer is different from your domain, then we consider this to be a landing. In that case we create a cookie named “v_landing” containing the url of the Verbolia landing page.
Default validity is 7 days.
This is done automatically on the Verbolia pages.
3. Integration of Parameter in the Purchase Event #
In order to track revenue properly, the parameter “v_landing” needs to be added to every
purchase event. The value of that parameter must be read from the “v_landing” cookie, if it
exists.
There are several ways to do this, it will depend on how you are currently triggering the
purchase event in GA4.
Implementation in Google Tag Manager
To implement this in GTM, here are the steps:
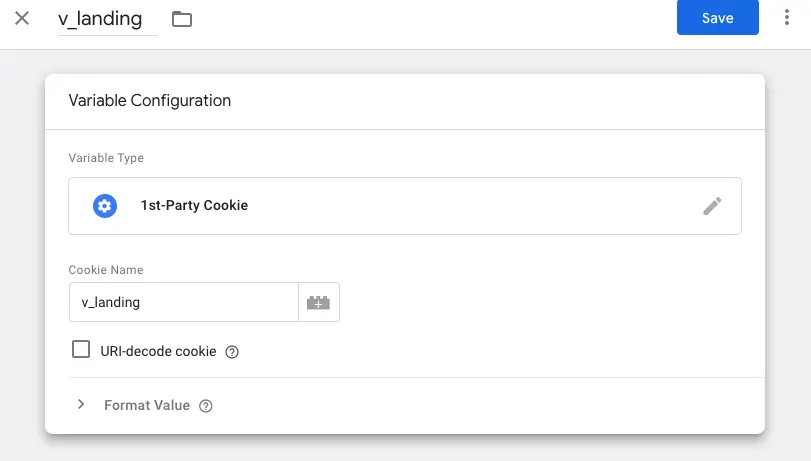
- Create a variable to read the cookie
In GTM, go to Variables, scroll down to User Defined Variables and click on New.
Choose variable type: “1st-Party cookie” and choose the cookie name “v_landing”, then
Save:
Note: you might want to populate the value from your code into the datalayer, instead of letting GTM read the cookie. If that is the case, you should choose a variable type “Data Layer Variable”, and define a datalayer variable name that you will set in the datalayer from your code before triggering the purchase event.
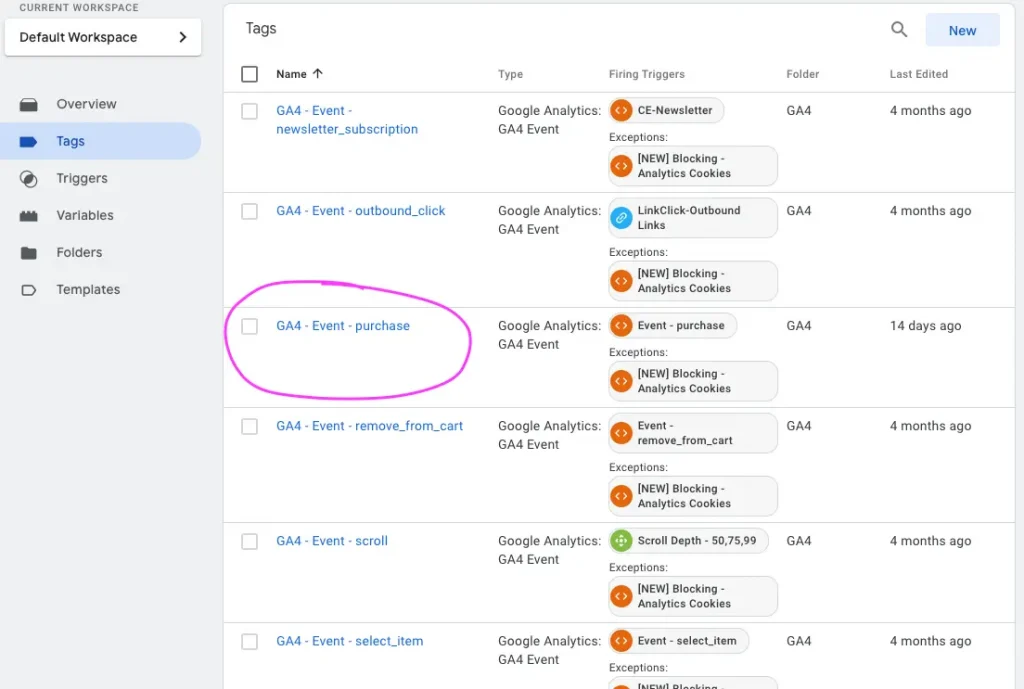
- Modify the Purchase tag to include the parameter
In GTM, go to Tags, and select the GA4 Purchase Event, example:
In the Event Parameter section, Add a Row, where you define the Parameter Name as “v_landing”. For the value, you can browse the existing variables and select “v_landing”, or directly type :
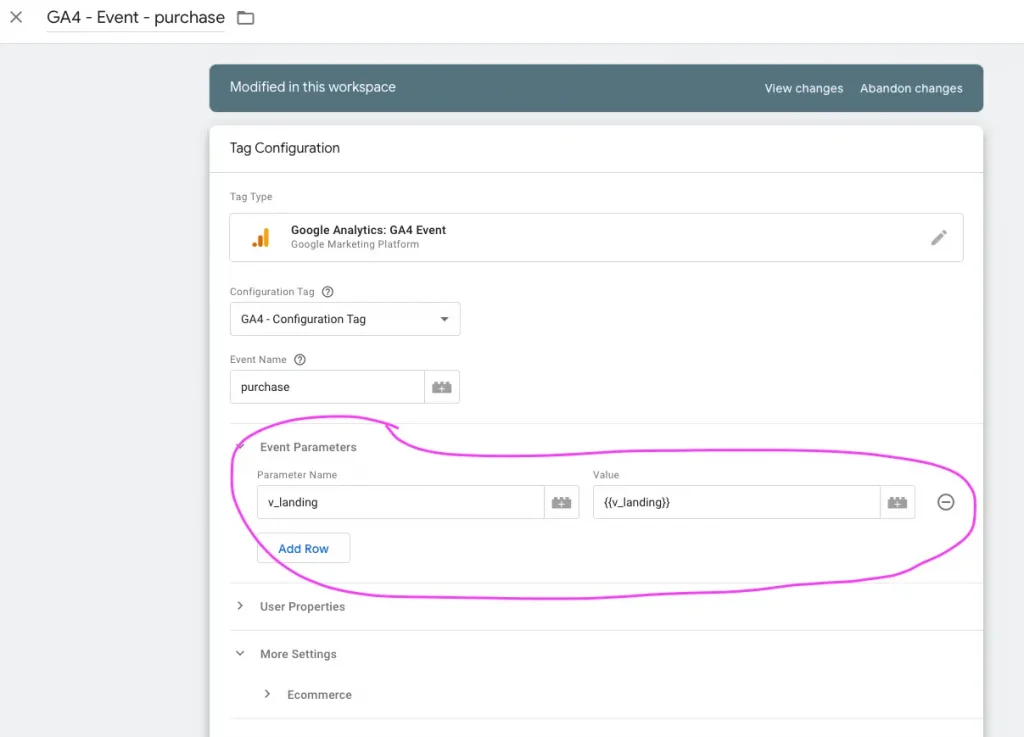
It is important to do this for all GA4 Purchase events the same way.
After adding the variable and the Event Parameter, do not forget to Publish the changes:
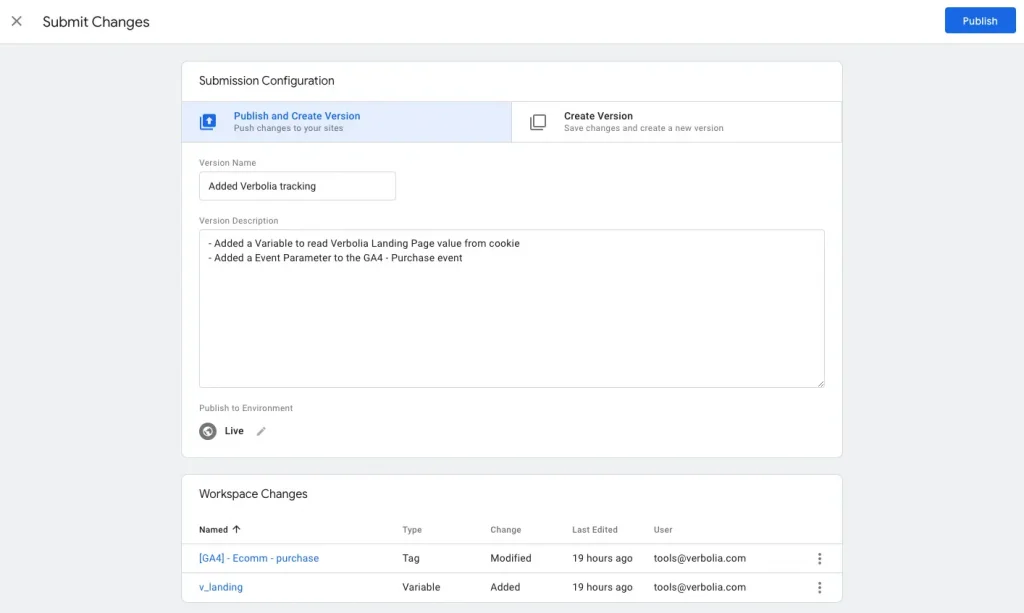
Implementation as a Javascript gtag call
A parameter named “v_landing” must be passed within the gtag purchase call, it’s value must be the url of the page that can be found in the “v_landing” cookie, for example:
gtag("event", "purchase", {
 transaction_id: "T_12345",
 value: 25.42,
 tax: 4.90,
 shipping: 5.99,
 currency: "USD",
 coupon: "SUMMER_SALE",
 v_landing: "/v/kewyord-page",
 items: [
 {
 item_id: "SKU_12345",
 item_name: "Stan and Friends Tee",
 affiliation: "Google Merchandise Store",
 coupon: "SUMMER_FUN",
 discount: 2.22,
 index: 0,
 item_brand: "Google",
 item_category: "Apparel",
 item_category2: "Adult",
 item_category3: "Shirts",
 item_category4: "Crew",
 item_category5: "Short sleeve",
 item_list_id: "related_products",
 item_list_name: "Related Products",
 item_variant: "green",
 location_id: "ChIJIQBpAG2ahYAR_6128GcTUEo",
 price: 9.99,
 quantity: 1
 },
 {
 item_id: "SKU_12346",
 item_name: "Google Grey Women's Tee",
 affiliation: "Google Merchandise Store",
 coupon: "SUMMER_FUN",
 discount: 3.33,
 index: 1,
 item_brand: "Google",
 item_category: "Apparel",
 item_category2: "Adult",
 item_category3: "Shirts",
 item_category4: "Crew",
 item_category5: "Short sleeve",
 item_list_id: "related_products",
 item_list_name: "Related Products",
 item_variant: "gray",
 location_id: "ChIJIQBpAG2ahYAR_6128GcTUEo",
 price: 20.99,
 promotion_id: "P_12345",
 promotion_name: "Summer Sale",
 quantity: 1
 }]
});
Example of code to read the value of the cookie:
function getCookie(cookieName) {
 const name = cookieName + "=";
 const decodedCookie = decodeURIComponent(document.cookie);
 const cookieArray = decodedCookie.split(';');

 for (let i = 0; i < cookieArray.length; i++) {
 let cookie = cookieArray[i].trim();
 if (cookie.indexOf(name) === 0) {
 return cookie.substring(name.length, cookie.length);
 }
 }
 return "";
}

// Example usage:
const cookieName = "_ga";
const cookieValue = getCookie(cookieName);
console.log("Value of the cookie: " + cookieValue);
4. Custom Dimension definition #
In order to have a clean reporting, it is necessary to create a custom dimension in GA4.
For this, go to Admin > Custom Definitions > Custom Dimensions and click on “Create Custom Dimensions”.
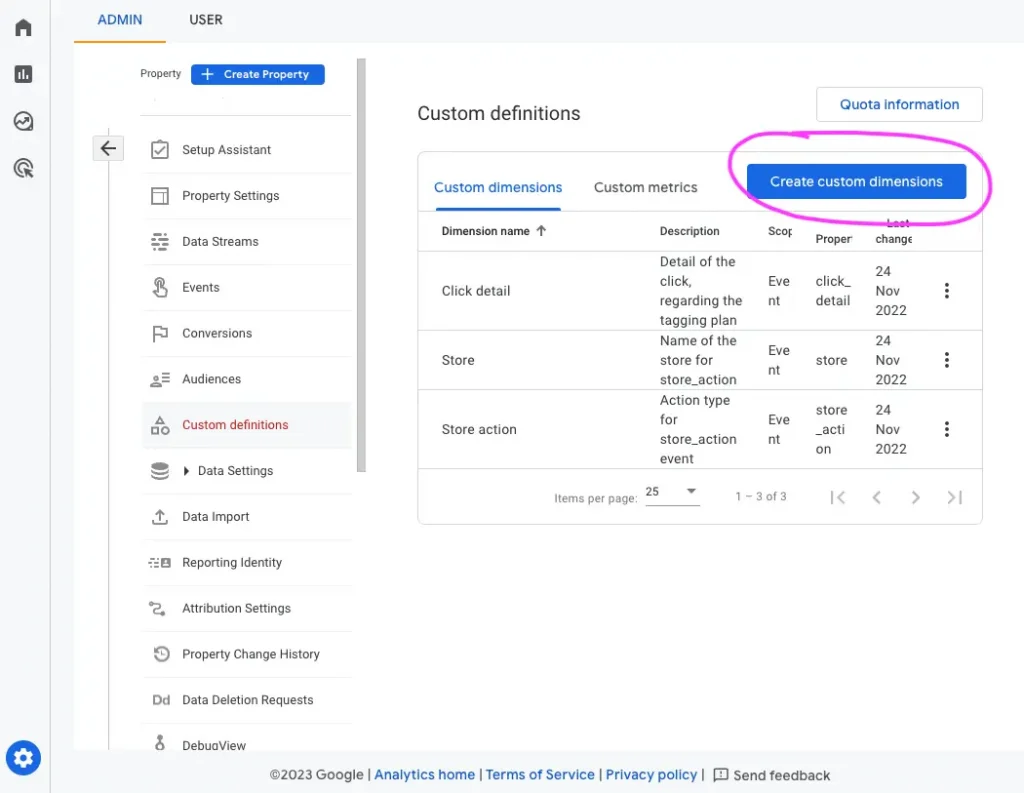
Define the following custom dimension:
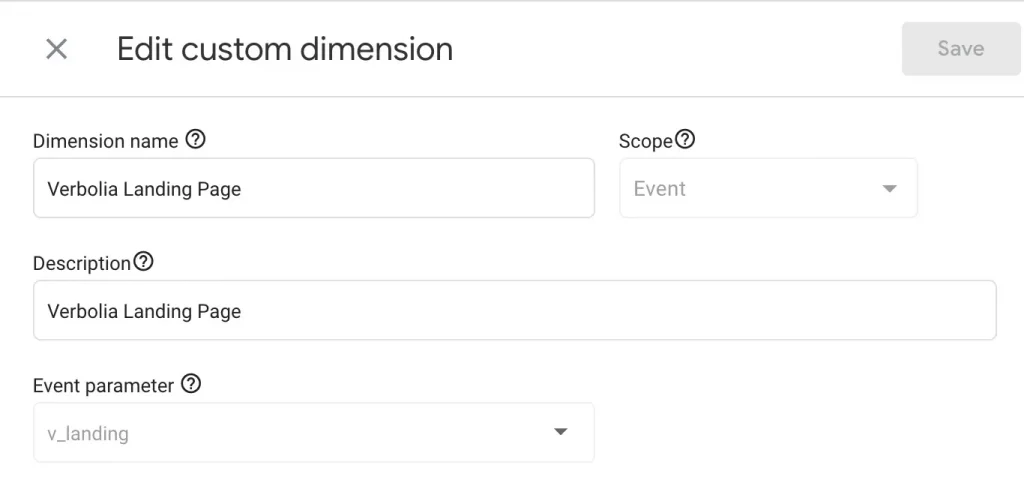
5. Login to GA4 property #
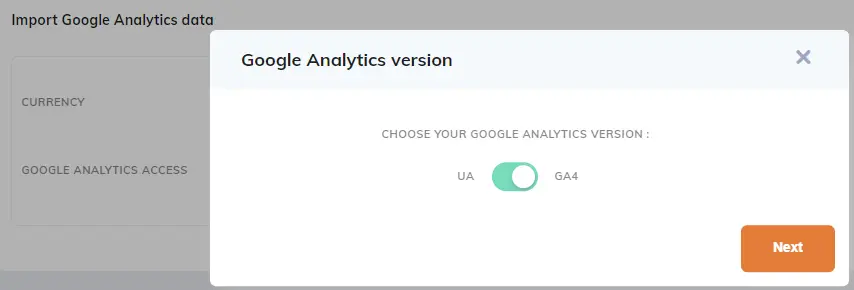
In the Verbolia App, go to Configuration/Settings and login with your Google Analytics account to the correct GA4 property:
- Select: Connect a different account and login with your Google Analytics account

- Change to the correct GA4 property on your account
6. Setup Report in GA4 #
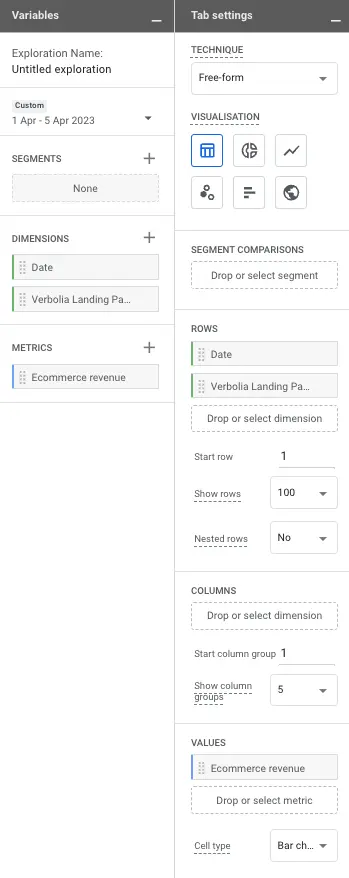
(basic) Exploration
Example of a basic Exploration:
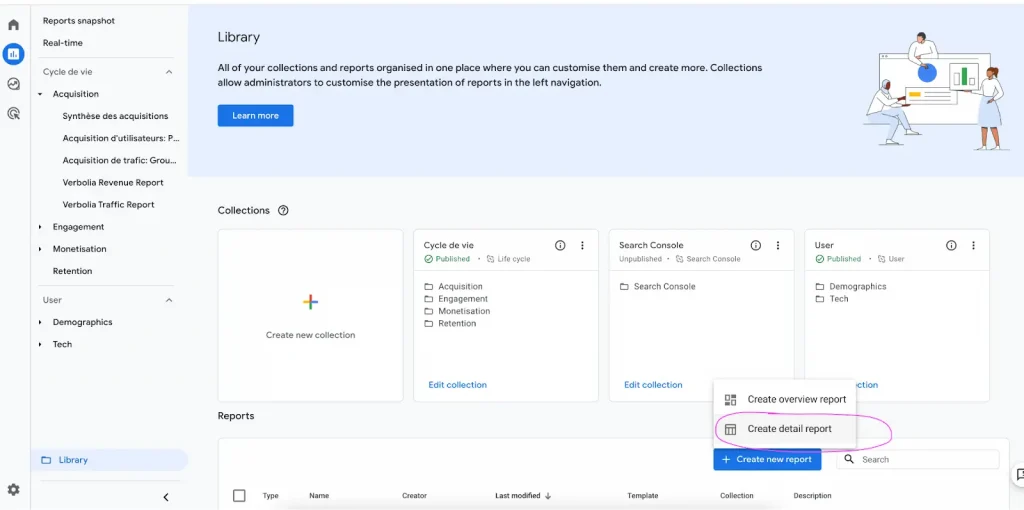
Create Verbolia Revenue Report
Go to Reports > Library > Create new report > Create detailed report, then choose Blank Report
In the right columns:
- Click on Dimensions, and add “Verbolia Landing Page”
- Click on Metrics and add “Total revenue”
- Click on Add filter, and add a filter on the dimension “Verbolia Landing Page”, and use the Verbolia folder as a filter (/v/ in the example below)
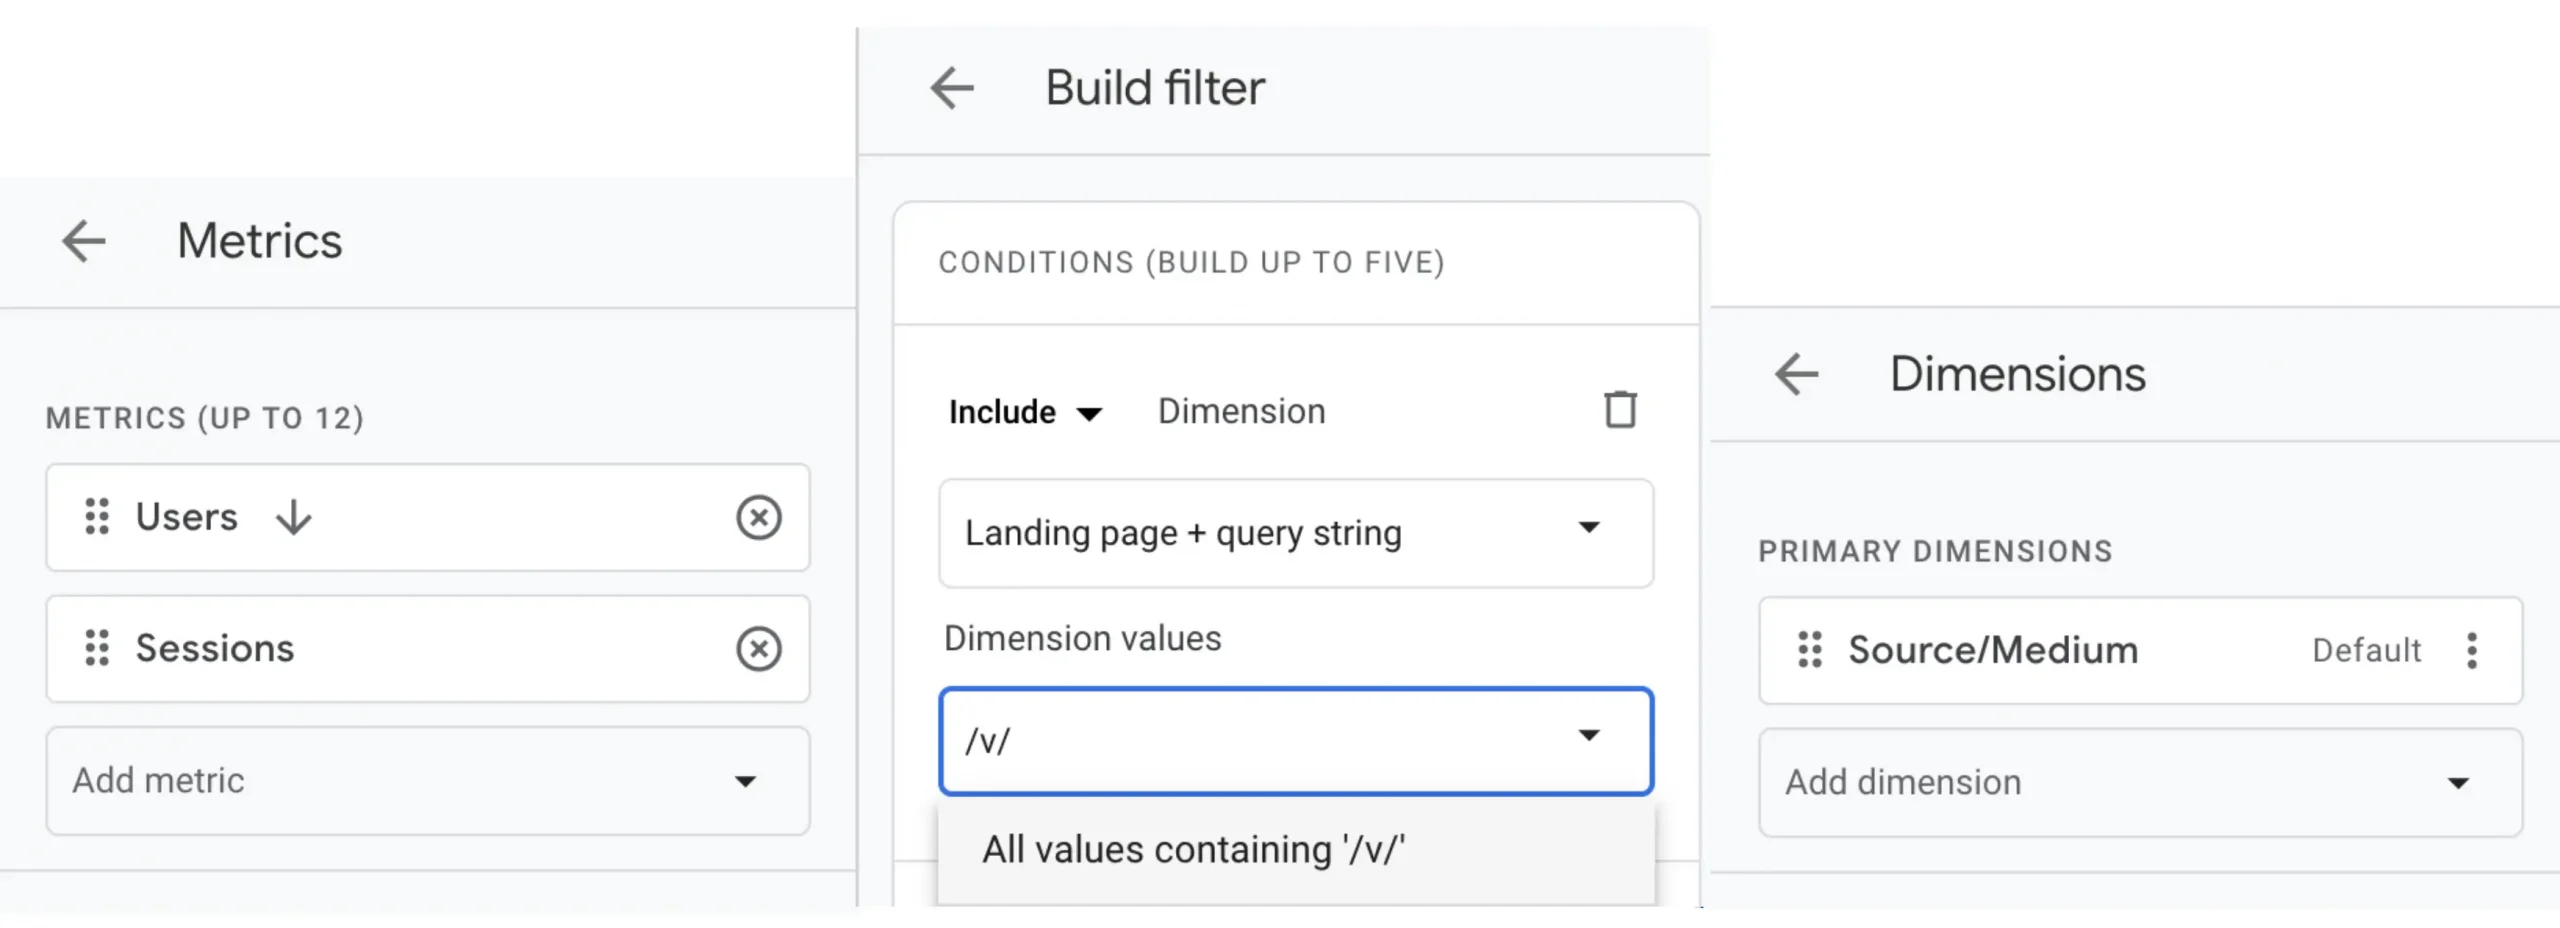
Then Save the report as “Verbolia Traffic Report”.
Move the reports in the Acquisition Section
In the Report > Library screen, click on “Edit collection”of the “Life cycle” collection:
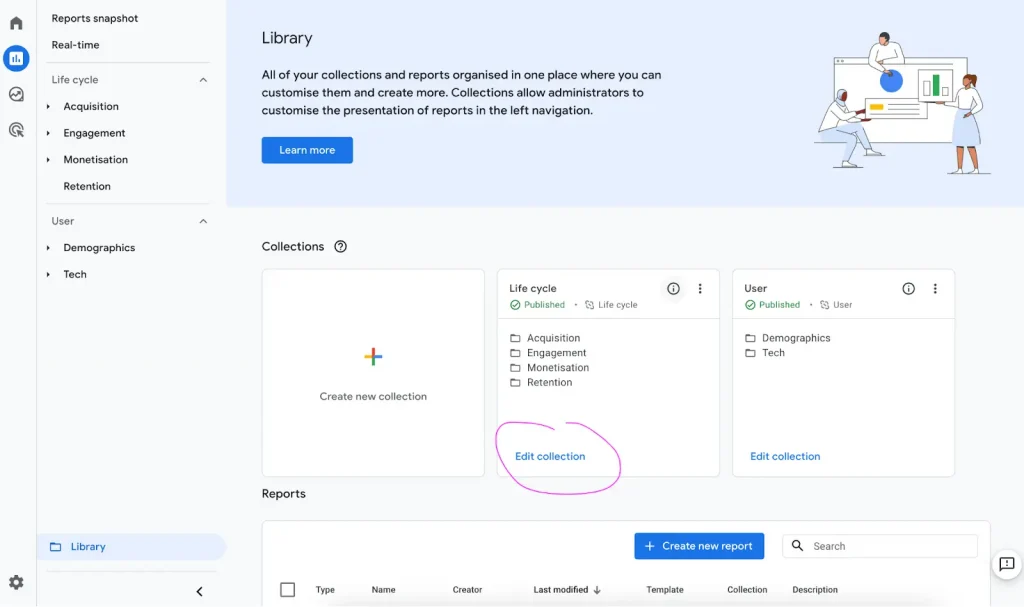
Drag and drop the 2 newly created reports in the “Acquisition” section:
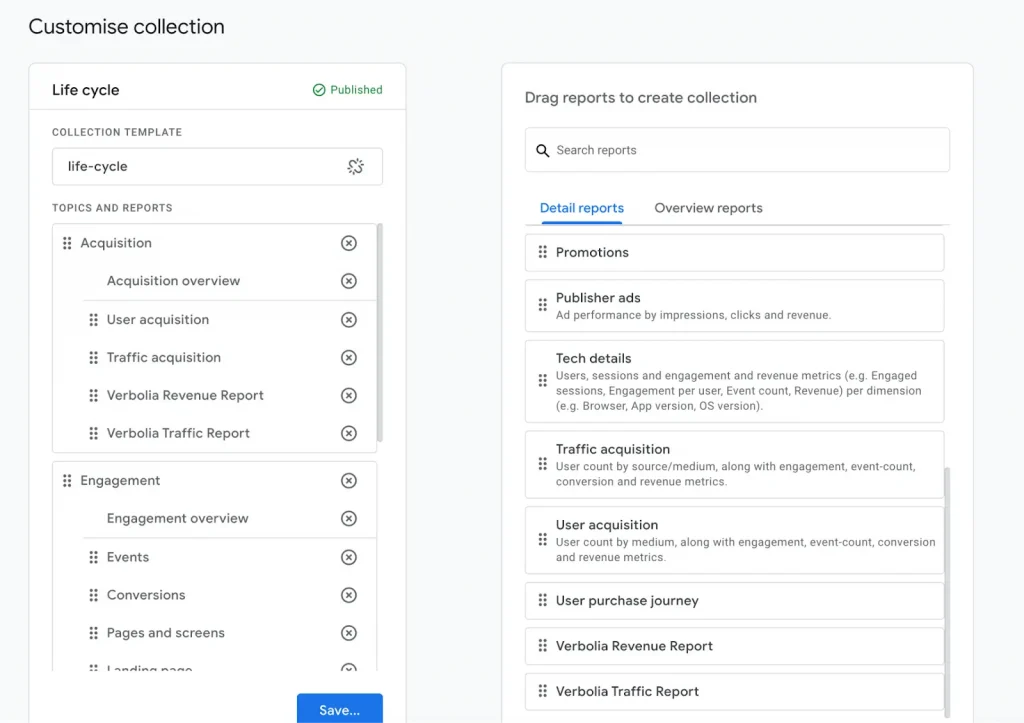
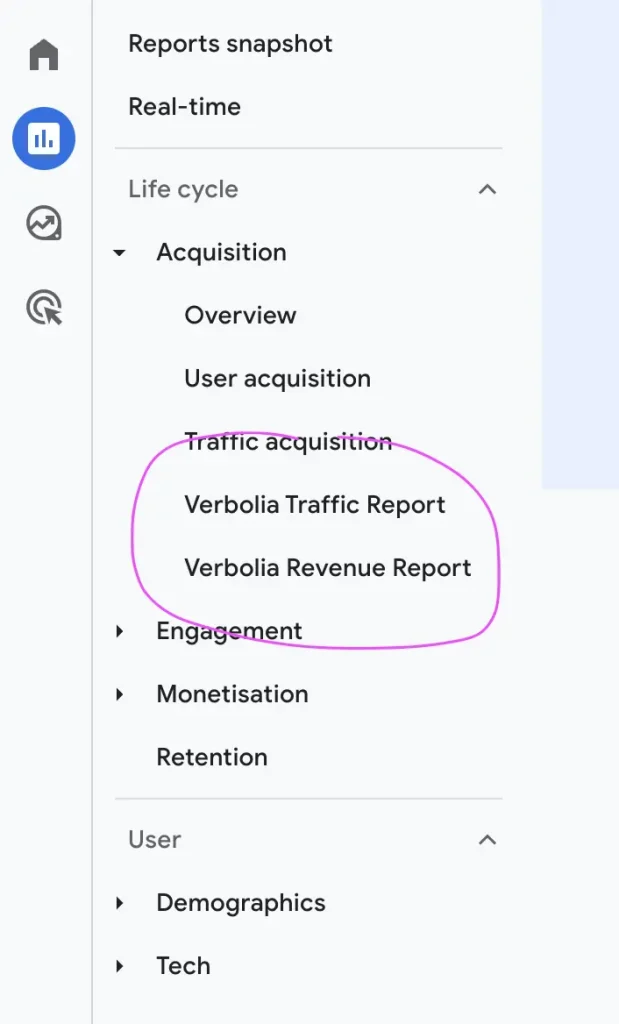
And click Save. The reports are now ready in the Life cycle report section:
